Painting Volume Decals
Paint volume decals in Radiant for better material blending.
Painting Volume Decals
Mod Tools: Theory and Practice
ThrowingMold
INTRODUCTION
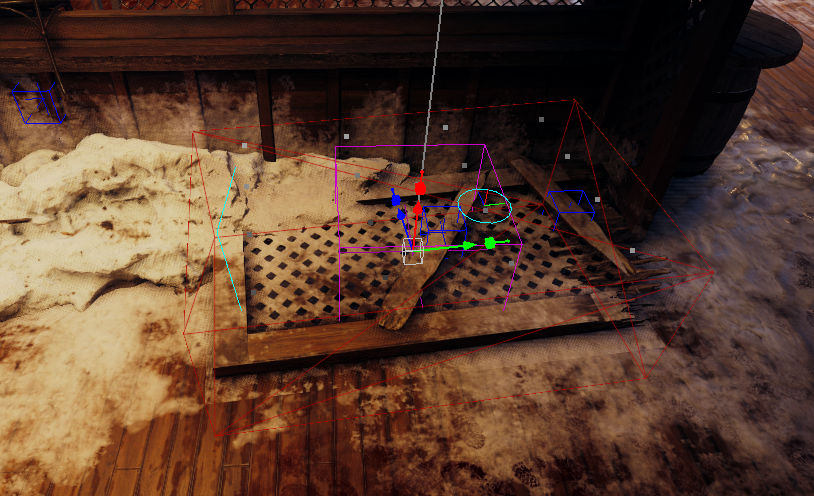
Many people know that you can use a volume decal in their maps to add extra detail around, though some don’t know that you can paint on them like terrain patches.
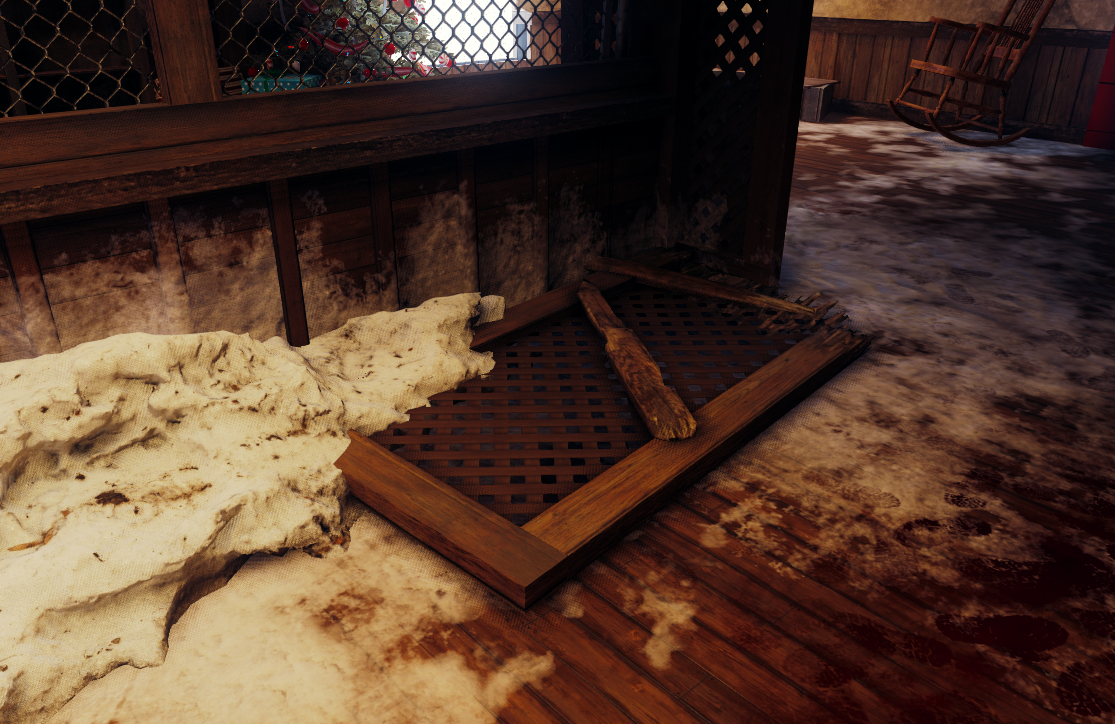
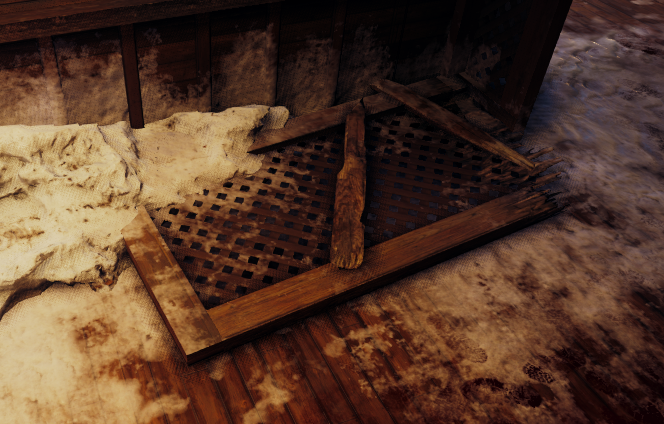
Consider the following, you have an area in your map with a mix of textures and models and the models aren’t blending in with the environment.
As you can see in this example image, the wood panel isn’t blending into the snow that is around and on top of it.
Most people would add a volume decal on top of them to try and blend it. But even then, if you can adjust the feather on the decal. But this doesn’t give you full control of the decal and how visible parts of the texture are.
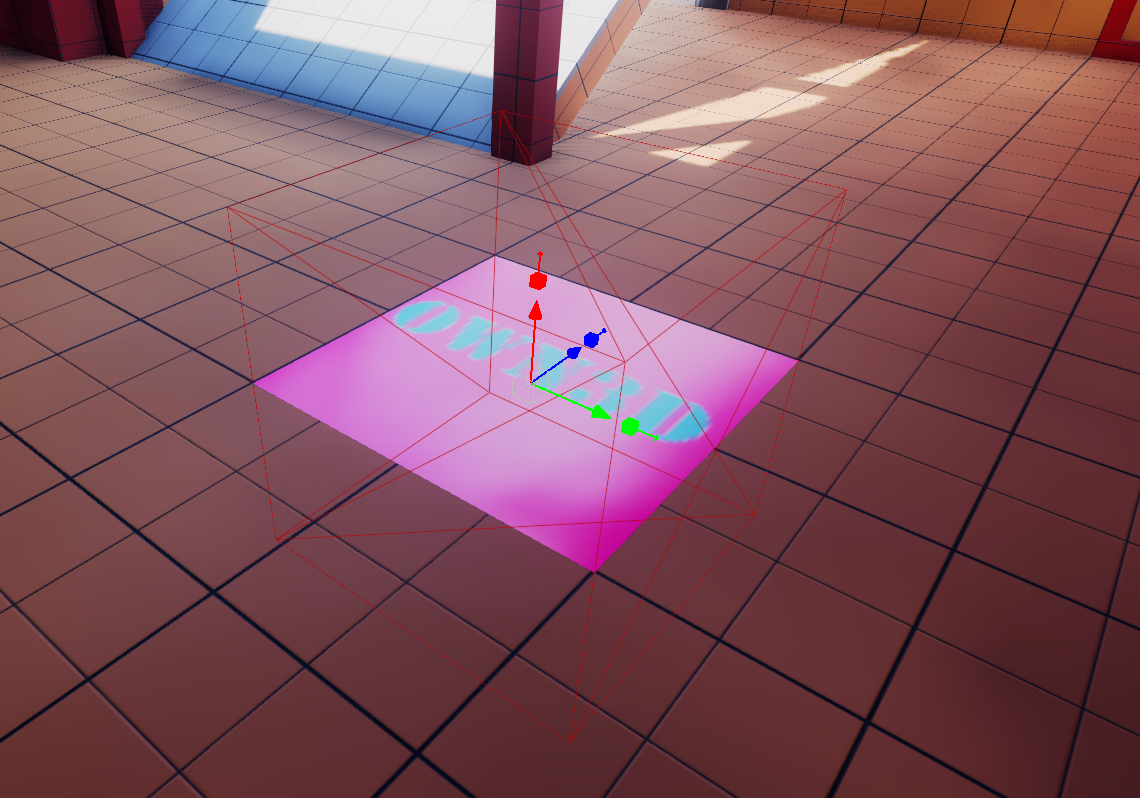
revealDataSize
This setting, found in your Entity Info when selecting the decal, allows you to enable paintable vertices. There are 4 options to choose from: revealAll, 4x4, 8x8, and 16x16.

Depending on which setting you choose will give you more verts to paint on.
I recommend this rule of thumb: The smaller the decal, the less verts you need to have.
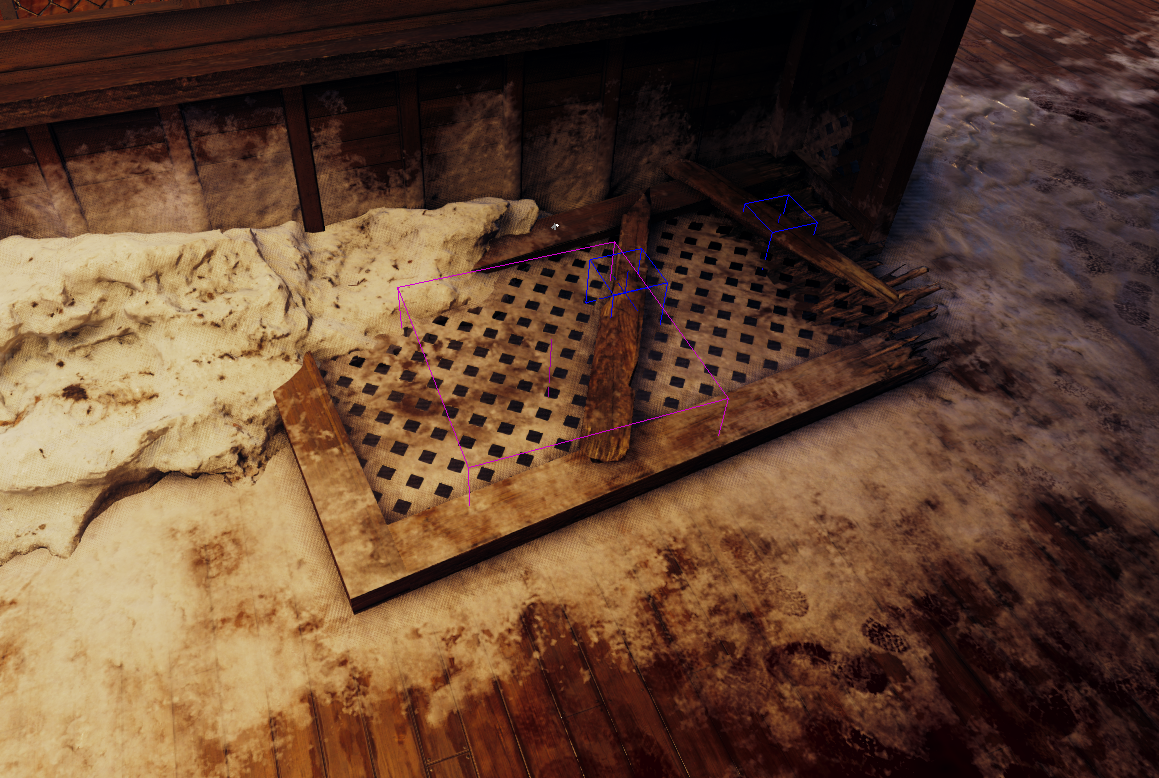
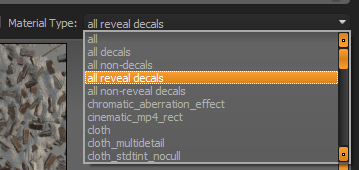
It is mandatory that your decal texture is a variant of a decal_reveal. You can find these by searching for “all reveal decal” in the material type of the Textures panel.
Now that you have the right settings and texture, you can go into the Advanced Patch Editing Options and paint your decal.
Key Take Aways
- revealDataSize
- Decal_reveal
- Advanced Patch Editing Options
Resources
Open the original Painting Volume Decals PDF
Feedback
Was this page helpful?
Glad to hear it! Please tell us how we can improve.
Sorry to hear that. Please tell us how we can improve.